This was due to be a simple cookie recipe, however, as unfortunately happens sometimes, it all went a bit wrong.
I thought it was an easy enough recipe, however they turned out like this:
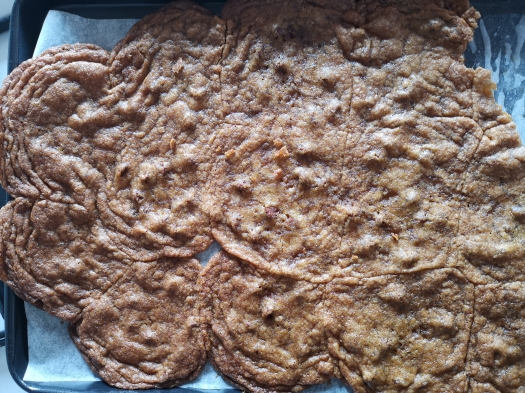
I believe this is probably due to too much butter in the recipe which I can adapt for the next batch, but in the mean time what am I meant to do with this mess?
Now, I could very happily sit and eat a pile of rubbish cookies (they still tasted delish) however, I would definitely end up regretting it. So, I got to work thinking of a way to re-purpose these cookies where I would be happy to give them to other people.
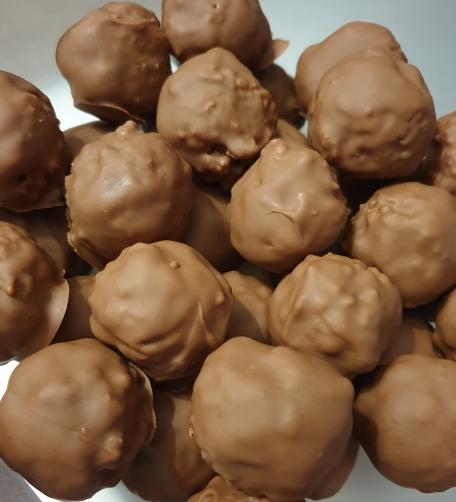
And from there, the cookie-pop was born (disclosure: I’m sure it already exists somewhere). If you are aware of cake-pops then you can see where I got my idea from. I figured, if I can crumble the cookies up enough then surely they will work in the same capacity, and they did!
Here are the super easy steps to salvage your cookie mess!
- Crumble your cookies into as small pieces as possible – a food processor will work best or a good old fashioned rolling pin – fill a sealable bag with your cookies (break them down a bit by hand first) and then get out all your rage by crushing them with a rolling pin.
- Create a frosting to match your cookie – i.e. chocolate frosting for chocolate cookies, lemon frosting for lemon cookies (or mix and match!). Depending on how many cookies you have you may need to trial and error the amount of frosting you need.
- Combine the cookie crumbs and frosting until the mix sticks together – if it isn’t sticking together then you probably need more frosting.
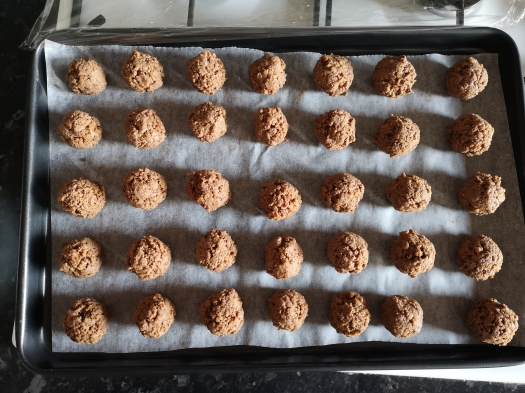
- Either using a mold or your hands, form the cookie mix into small balls shapes and put aside on a grease-proof paper covered tray.
- Once you have shaped them all, put in the fridge to help them solidify (at least 30 mins).
- In the meantime melt your chocolate of choice into a bowl (a small and deep bowl would be preferable) – again try to match to your cookie/frosting flavour. If you’re using white chocolate you could also add food colouring to make it more exciting!
- Once your chocolate is melted and the cookie balls solid, you can start dipping them in chocolate. I would recommend using 2 spoons, make sure you get full coverage but let any excess chocolate drip off (otherwise it will just form a puddle on the tray) and then place back onto the paper-lined tray.
- If you want to add any extra decorations on top (i.e. sprinkles) now is the time to do it while the chocolate is still melted.
- Try to do this fairly quickly so the cookie pops don’t soften before you cover them, then place them back in the fridge for approximately an hour.
- Double check but by this time your chocolate should be fully solidified and you will be able to move the cookie-pops to another container.
- I would recommend storing them in the fridge so the chocolate doesn’t soften.

I also had a thought about some other ways to re-purpose cookies when they go wrong:
- Cheesecake Base (crumbled and add melted butter to hold it together)
- Or any kind of pie base really (lemon meringue, chocolate – whatever your preference)
- Cookies & Cream Milkshake
- Add some biscuity crumble to your yoghurt or ice-cream
- Authentic ‘dirt’ crumble (crumble chocolate cookies to look like dirt/soil to use as decorations)

Do you have any other suggestions for using up leftover/ruined cookies? Comment below!
Follow my Instagram @siansblogs for more foodie updates!
Also See: Cadbury Hot Chocolate Cake & Easter Tray Bake